Tag Archives: farming

A Look at Life

It is the new year, and I am enjoying watching the world around me, as it grows, and comes to life. January is an interesting time in upcountry Hawaii. Cool, misty rains will be followed by bright sun and high winds. It is our “wet season” where many vining plants will stretch out their arms, and cover their surroundings.

I often make a lot of comfort food in these cooler days. The slow cooker is often on, and jars of soaked seeds come to life on my countertop. It is a wonderful time to make these warm, slow cooked meals, and use the ambient heat to germinate those seeds who need a little more warmth. Heating pads could be used, but then I wouldn’t have the slow cooked soups. Tomato, bean, and chili pepper seeds will get this jump start germination, right before my eyes. I feel again like a child, as I spy on secret worlds in every corner of the pond, garden, and kitchen.

Mexico Midget Heirloom tomato seeds germinate in a simple jar

The greenhouse also wakes up for another season. A Japanese White Eye bird was found in there, and seemed eager for my assistance. Once freed outdoors, it quickly returned to feeding on the young banana blooms. Orchids also bloom, and multiply, and my aquarium guppies, will be freed into the flowing waters of the aquaponics system. Appearing like embers of red, flashing inside the glass vessel. I paused for a moment to take one last close look, before releasing them into a much larger place for them to explore.

Work is everywhere. Planting, and collecting. Repotting, and pruning. Full days, and cozy nights of Winter reading. I don’t even bother to make lists of what needs to be done. At this time of year, everything needs to be done, and every task completed is something to celebrate.

A beautiful Japanese White Eye

Waimea Gold

A brief note to update you all on a new variety I am breeding for Hawaii.  It is called “Waimea Gold,” and it is growing beautifully here.  I have crossed two strong landraces, then inter planted with other c. moschatas that were performing well. I allowed them to again cross, and now I am hand pollinating and selecting traits.  This last step is currently going on, and it will be part of the stabilization process.

The result is a market variety that is beginning to show up at some of our farmer’s markets, and the chefs have been serving them up too.  I have given seed to two local farmers that are growing them already. They have noted that it just “wants to grow” which is exactly what we need.  No fuss. But I will be doing a bit of fussing in the months ahead, as I continue to stabilize the traits.

For those of you interested in plant/squash breeding, here are the traits that I am selecting for:  Small size (3-4lb max), smooth, easy to peel, versatility in flavor profile (can be used in a wide variety of dishes,) pest and disease resistance (especially powdery mildew and pickleworm,) and best of all it is a contender to give the imported bland little kabochas a run for their money.  Tasty and local…not to mention kinda cute.  Here are the current photos! The green ties on the stem mark that the pumpkin blooms were hand pollinated for seed purity. So Waimea….let’s hope we have struck gold!

Squash Rich Soil Poor

Two years ago, I planted a new area with squash, I was hopeful and optimistic.  It was open, free of the Iron wood trees, but it desperately lacked soil and the area needed serious rehabilitation.  I thought I had given it a good look over, but what I had underestimated was the wind. I was fortunate to have timed my plantings in a year where heavy rains broke the 15+ year drought. The plants thrived.  But then the winds came, and destroyed the raised beds, made irrigation very complicated, while also setting back my optimism.  Those Winter rains were a fluke, and they haven’t returned again.  The wind gusts, on the other hand, have returned with great force, just when you least expect them.  For the last two and a half months it has been blowing, then punctuated by dead calm. As a personal challenge, I decided to rethink that area, and figure out how to do raised beds in a wind gust area while also using minimal irrigation.  I needed to figure out a way to farm rock.

I walked the area with Randy, the AG (mainly pest and plant disease) inspector.  He kicked the ground and noted that they call it the Kau Desert for good reason.  He is facing retirement at a time when farming in Hawaii has hit some pretty hard times.  My projects seemed to offer him hope and a few smiles in is last years as an AG field agent. Farmers often speak of rocky soil, but this isn’t that.  This is rock, period.  100 years ago, and as recent as 50 years back, the Japanese farmers of this area just removed rock day after day.  When I say rock, I should note that they are boulders. They created areas of farmland from this rocky outcropping.  Some areas are now cultivated by tilling methods, some are run as ranchland, and my borrowed parcel is run as no-till.  This Spring I am again facing off with the hardest to farm section of the property.  Here, patches of rock that have been exposed by years of wind erosion, and that hard layer of stone will be under my beds.  Under normal circumstances, you would never plant on top of rock, but this is a test of possibility.  If you can grow there, your system will grow just about anywhere.

The above photo shows what the ground looks like under the new garden system that I am creating.  Roots will not be able to penetrate those stones, so all that they need will have to be delivered through the raised bed system.  The soil that is there is no longer capable of absorbing and retaining water.  But soil has an amazing ability to be transformed back into a condition where it will absorb water. So let’s get to work…what needs to be done?  First think about your wind and wind directions.  Where is it blowing from most of the time?  I am planning on running one simple soaker hose through the base of this bed.  Overhead isn’t going to work like it does in my other patch.  In the main patch, overhead works, because whenever the wind blows, it will blow the water onto a plant, in this area, that isn’t so. Also minimal overhead irrigation works in the other patch because of the tons of soil building materials that were reclaimed and put to work as a living mulch. A technique that works in one area may not work right across the road.  So once you think through your irrigation strategy, think about the movement of the sun.  In Hawaii, you can really notice a difference in the direction of the sun’s rays, season by season.  Lastly, is it in a location where you will be able to check on it easily?  Anytime you are doing a test project, a watchful eye is going to lead you to learning from the experience.

I reused some wire table tops for multiple reasons, I wanted to see if they would:

1)keep the wind from tipping over the stacked design of the beds

2)keep the chickens out

3)create a sturdy base for a trellis

This is what they look like with a variety of squash and edible gourds creeping through.

DSC_1196

Not bad, but it gets better.  Since I have been working to locate and breed heirloom varieties that are disease resistant, I am putting that to the test as well.  Powdery mildew knocks growers flat when they first start growing in Hawaii.  This method of mine would never work without the prior, careful study of natural disease resistance. So in other words, know your plants first.  I am planting absurdly close plantings of all kinds of things: tomatoes, beans, mustard greens, tomatillos, even some flowers.  Most of these I have grown before, but some are new to me heirloom varieties that are getting their “test” here at the farm, such as the Zuni Gold bean that is loved in New Mexico. We see how things turn out for them this year.

DSC_1246

The idea is to create a mini food forest with tier upon tier of food. It is my own interpretation of the “Three Sisters” planting method, combined with another Native American technique that includes burying fish.  I have fermented the fish first, adding much needed microbes to the mix.  My compost scares people.  But I am in Hawaii and we don’t even have compost facilities anywhere near where I live.  I became the compost facility by working with my chef customers. Raw and fermented material is at the bottom, and it will have plants growing above it.

The close plantings will be a “only the strong survive” kinda deal. Plants can “work it out” and find their ways to get enough sun, water and nutrients. So far, they are working together nicely. are two months in. These close plantings also protect from the drying, harsh winds.  These close plantings also create strength in numbers by supporting each other against the gusts.  High winds can snap tomato and tomatillo stalks, even with some trellising.  This will help your system to better take care of itself. Not only will this planting method provide a great variety of foods and beans will add nitrogen to the soil, it is also planted with bees in mind.  Bees area squash growers friend, but unfortunately, they are few in number here where I grow.  So I make a bee buffet of all kinds of blooms.  I plant in harmony with the native Hawaiian plant Ilima and give those small blooming shrubs extra care and nutrition, and they supply lovely blooms to attract our bees.

DSC_1231

Here we see tomatillos growing in harmony with the squash plants.  Those bright yellow blooms will be a beacon to the bees.  Strings run up from the table tops to a simple bamboo trellis that has the ability to shift in the wind.  It has already withstood nearly 20 days of heavy wind, so it has proven itself.  DSC_1247

As for the chicken proofing, Hunter is seen here patroling the surrounds while not disturbing the plants themselves.  The chickens and I have all enjoyed their collecting of many harmful to the garden insects.  I should also note that these plants are growing in very raw compost, and all reclaimed materials were used.  This is not something that I advise you to do, but I am doing it as a means to see how fast the restaurant waste can turn to soil.  It can be done with careful planning, and a lot of trial and error.  I will leave that for another post.  So I encourage you into thinking of creative ways to grow your food, create your soil, save our water and nourish our bees.  If this can be grown on rock using restaurant waste, so much is possible.

Lessons from a Rooster

When thinking back to the family farm of my childhood, I remember the animals most of all.  Some things will never change. I have always felt a connection to the creatures around me.  I credit my parents for instilling the strong sense of responsibility that goes with caring for animals.  When the storms came, you went out, not in. You stayed out until every single one was accounted for. Their health and safety was always on our minds.  But with that being said, I’ve found that I have had to acquire what feels like an enormous amount of skills.  Now, I am the grownup, and that means that I need to figure out how to care for hurt or injured animals, often times on my own. Some of it is natural to me, some of it takes all that I’ve got.

2015 brought upcountry Hawaii the mosquito spread avian dry pox, in wave upon wave of illness. It does not effect humans, or other animals, but it can be devastating to birds of all kinds. I was fortunate that I was given the “heads up” warning by an old artist friend of mine.  Her alert allowed me 72 hours of precious time to come up with a game plan. I was able to prep the birds, by giving them extra things in their diet. Nutrition was key to helping them through the pox, that can also cause blindness.  For six weeks, the illness first struck the domesticated laying hens, then spread to the wild poultry that are near home, and then those at the farm.  I steamed pumpkin scraps and fed all of them really good food.  Lethargic sad looking birds were everywhere.  Even very wild hens and roosters allowed me to gather them up and put them in poultry ICU. That was a clear signal that they were very sick.

The most challenging order of business was eye care, as the pox often involves the eyes of the birds.  I wrapped them in bath towels, nice and snug, then bounced and patted them like a baby before swabbing their eyes with homemade saline solution. Every day, I made a new batch of simple medicine from local Hawaiian salt, and boiling water that has been left to cool.  This went on three times a day, for each bird, at both locations, for weeks.  This work was on top of the normal ins and outs of vegetable farming.  It felt like I lived on coffee for 3/4 of each day.  There are things that you just have to do, regardless, and this seemed like one of them. It wasn’t the kind of thing I could turn my back on.

I had been down this road before, when the neighbor dog was injuring the hens.  I realized how much was possible, and how loyal and grateful each animal became after caring for them.  A lot of people ask me why these animals are so loyal to me, even though none of them are mine.  I think a lot of it comes from the fact that each and every one of them has been sick or wounded in some way, and I did my very best to step up and help them out.

I have been told that chickens are mean, dumb, that they have no memory, and they are untrainable.  I have found that none of these things seem to be true.  I will never forget the day that Ruby, a wild rooster that was blind in one eye, laid at my feet while I kept his son alive, and also able to see.  I was trying to save at least one of the young rooster’s eyes.  I will never forget that day.  It was pretty powerful to have a full grown wild rooster lay at your feet as you gave another one emergency care. It was clear that he knew what I was doing. I was caring for his family, and he knew that he could trust me.  Ruby remained loyal to me.  He was a lovely, powerful rooster that had survived three mauling by roving dogs, the pox, and even severe injuries from a rival rooster.  In the end, he died in my arms, wrapped in a towel, warmed by the setting sun.  I had administered treatment for him dozens of times, but then finally, his complications let me know, that I had to put him down in the quietest way possible.  I cried.

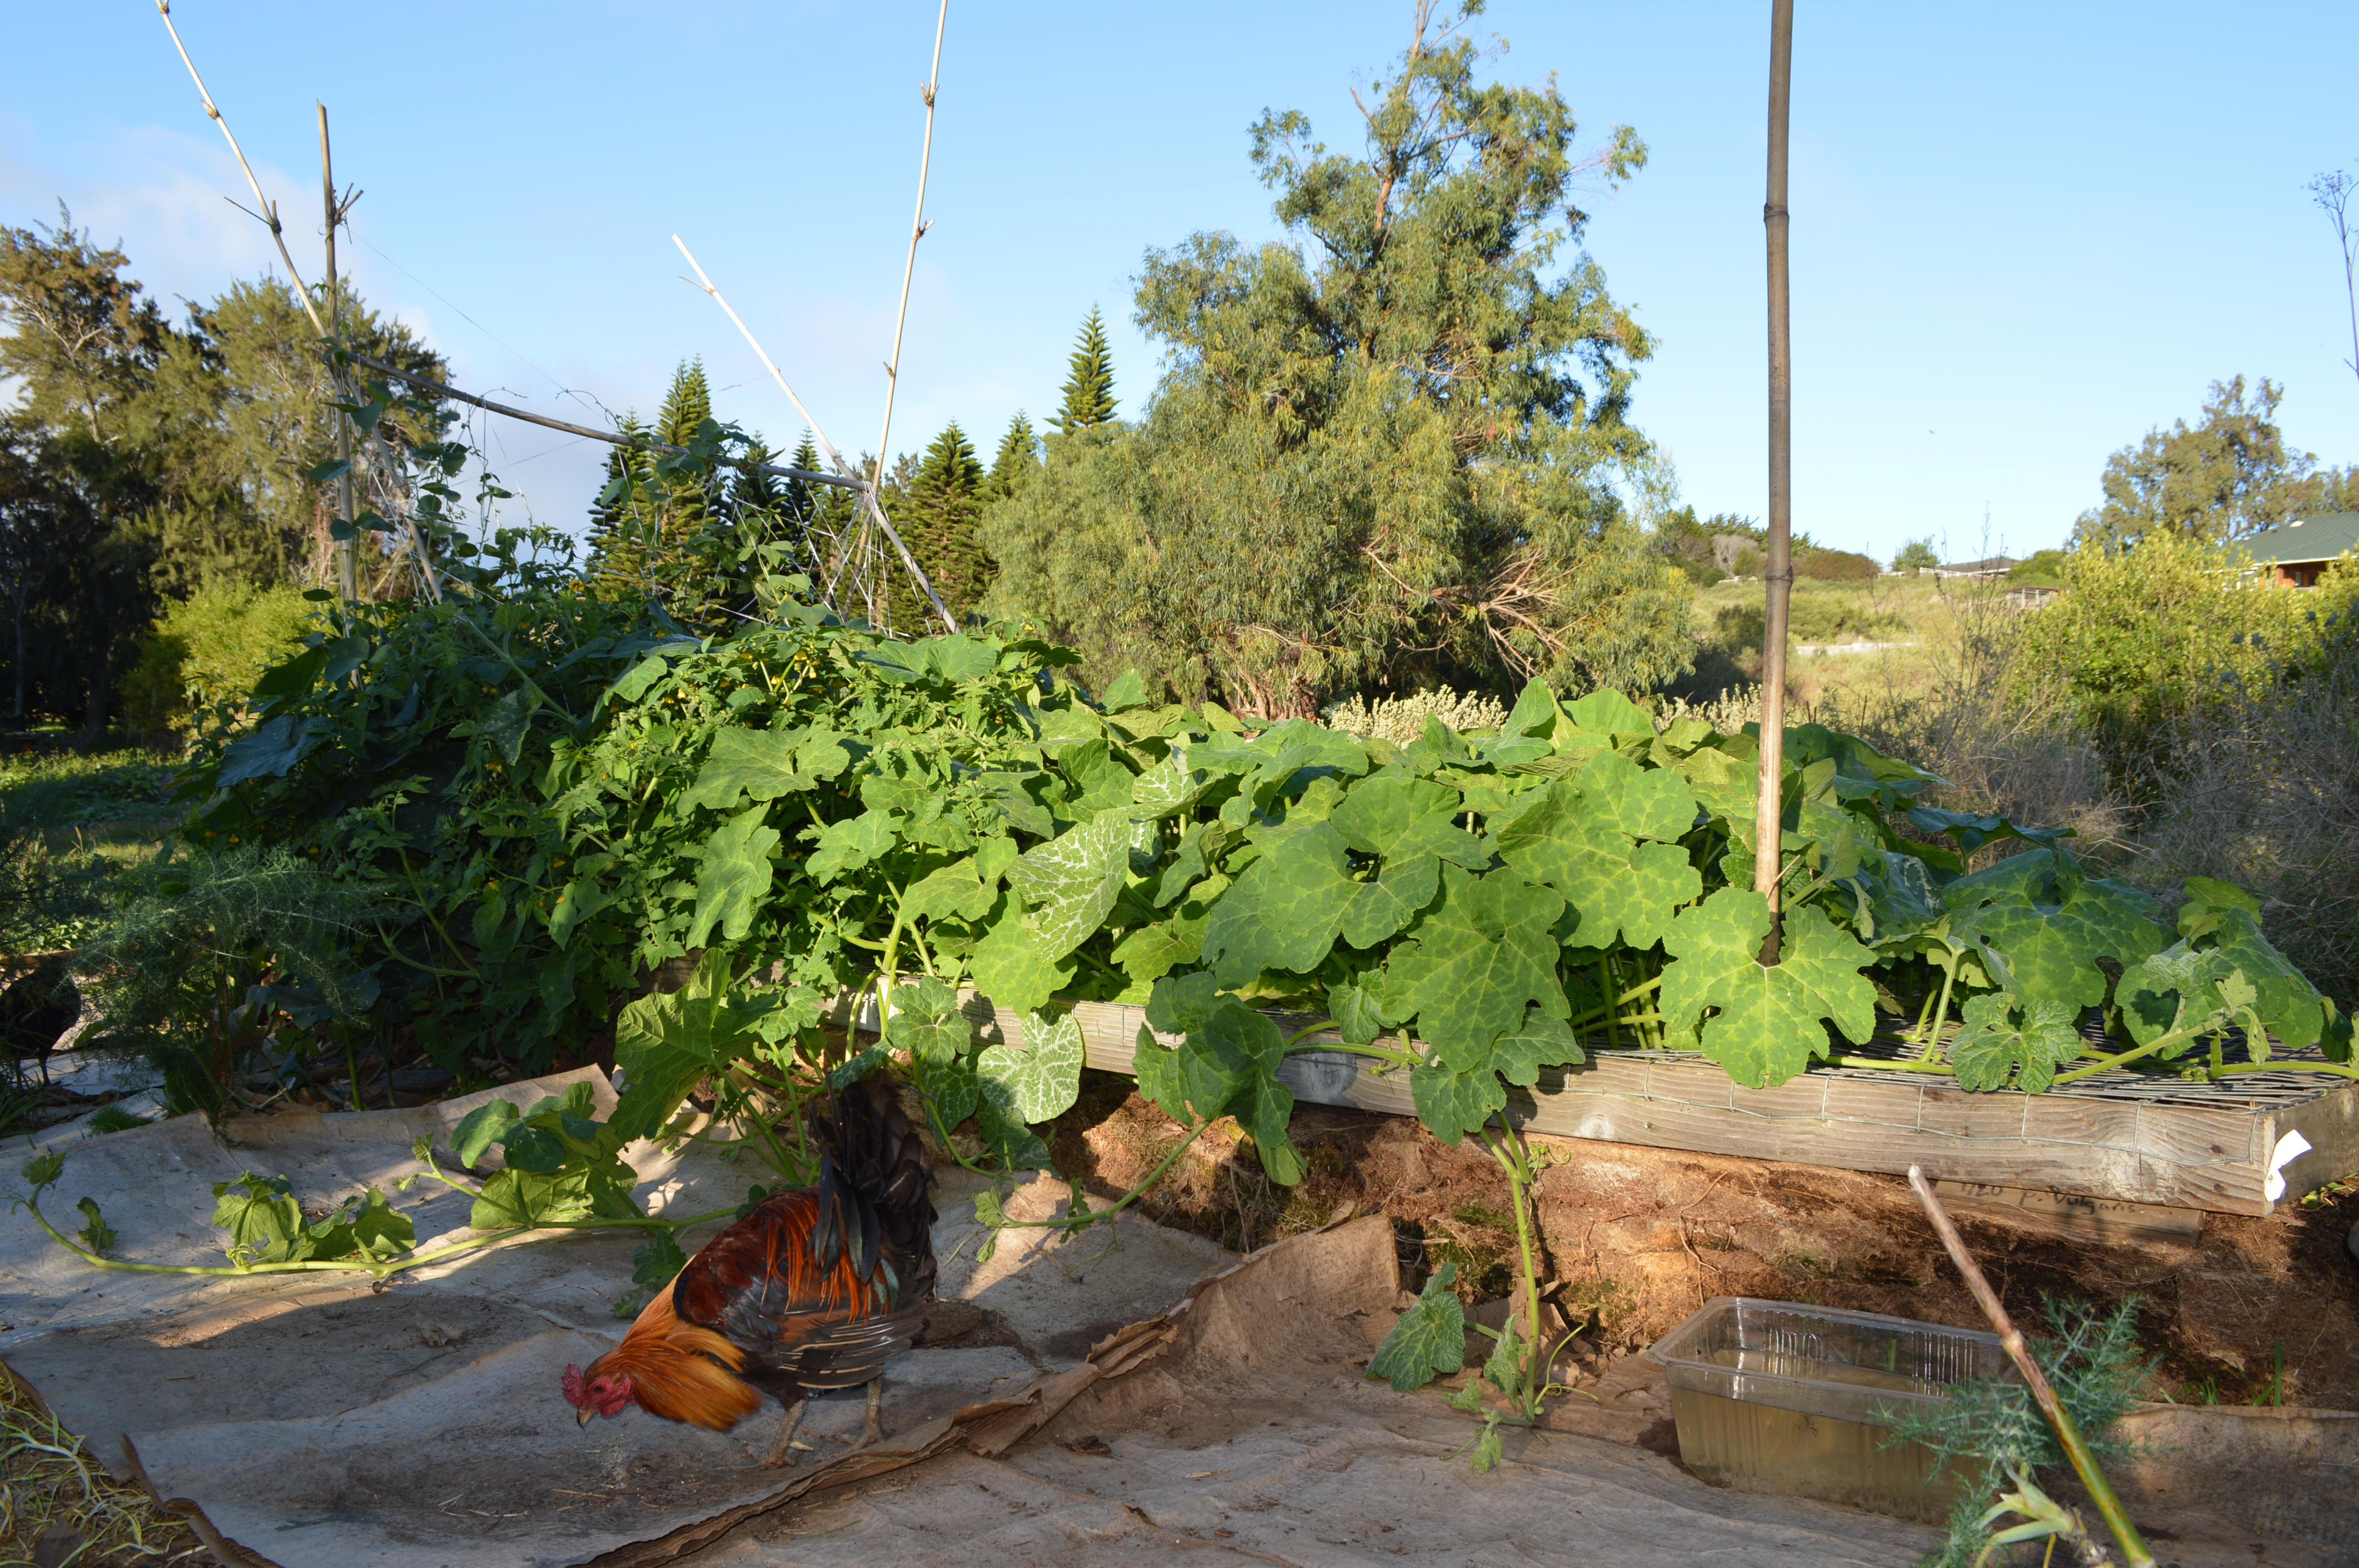
I buried Ruby beneath the chili peppers at the farm.  For a good long while, the dogs and I just sat and watched the scene around us. The setting sun. The closing squash blooms.  The young hens that stood on Ruby’s new grave. I realized that my family taught me to not overlook such times.

For me, this rooster’s story became symbolic of so much more. I realized how much we learn about ourselves by observing.  Ruby’s story also impacted the life of a WWII veteran at a talk I gave a few months ago.  I was explaining about why I chose to explore squash and farming. I give some context so to help illustrate what keeps you going.  There are a lot of reasons to give up, but also plenty of reasons to continue on. Ruby was part of that context.  I had given out one of my farm cards to each and every of the 60 Sr citizens in the room. Each of the cards had a photo image that I took at the farm.  Some were of flowers, others of pumpkins, baby chicks, and, of course Ruby the rooster.  I passed them out before my talk, and decided not to give a power point.  Each person held an image of the farm in their hands, like a piece of the puzzle.  If you put them all together, you understood how I live my life. If you listened to my talk, you understood why I live as I do.

I had tried my best to guess who would like what photo card.  Who might like dogs. Who loved cooking. At the end of my talk, many of the elders were now holding those cards like a treasured possession.  They had a tiny piece of my story, and that inspired them to share their own stories.  In my talk, I noted that in order to make the drive up to meet with them, I had to reassemble the fuel injection of the old VW that now sat in front of the “speaker parking” sign that they had placed in the parking lot for me. I told them that I also chose to go out of my comfort zone, so to save a rooster’s eye, before making the drive to meet with them.  I generally do not discuss surgical type farm things, but this seemed like a group that could handle it.  The point was that farm life can nudge you into self discovery.  There are those that will act, and those that will look the other way.  Along with this came the story of Ruby, and more, filling over an hour with sharing.

As I made my way out, to the sun filled doorway, several hugs and handshakes came my way.  One of the WWII Veterans that lined the back row, pointed at the photo card that I had chosen for him, and excitedly asked if “this is the rooster whose eye I was trying to save?”  I said no, that the photo was of Ruby, the young rooster’s Dad.  I was happy that my card selection was right, that he would like roosters.  He kept holding my hand, squeezing tighter as the tears welled up.  The previous excitement washed away in an instant.  I squeezed back and simply said in the most comforting voice I could muster up, “yeah, that is good ol’ Ruby.”  Then I simply waited in a way that my WWII Veteran father taught me how to do.  Just wait.

I can only guess what my rooster story meant to that man.  His eyes gave me a few clues.  To be the young rooster was easy in comparison.  Young rooster fell ill, and the farm girl cared for him.  To be Ruby was much more complex.  Ruby had put himself in danger over and over again, so to protect.  He had been mauled, and left for dead, and recovered over, and over.  Then, after being through so much, he laid at my feet, showing strength and courage without the fight.  Ruby had learned to trust, regardless of what he had been through.

The Veteran’s handshake tightened, and he lowered his head as a few tears slipped away. Maybe it was my story, or the symbolism, or the fact that in the end, I recognized the complexities of other lives.  Maybe he realized, that if I could see all of that in a rooster, that I probably saw right into his soul as well. I could only guess that he’s been fighting the war, and fighting the flashbacks, and fighting in ways that I’ll never know.  He’s been fighting for more years than I have been alive.  Maybe just what he needed was some farm girl to drive up in an old Super Beetle and allow him to stop fighting so hard.  That maybe in his own way, his tears allowed him to lay down like Ruby, and to trust, before watching me drive away.


Picture Perfect Pumpkins

I frequently reference putting a small block of untreated lumber under your pumpkins and Winter Squash.  Many people note that they do not have the time to do so, but also note that wet weather and bugs caused their squash to rot in the field.  I recommend making the time to protect your pumpkins with a little extra care. The way I look at it, by increasing your yield through the reduction of waste, you are saving time.  I took these photos (below) to give people an idea of what squash that have remained in contact with the ground all season can look like, especially here in Hawaii.  Keep in mind that in Hawaii, many of the Winter squash and kabocha that do well here take more than 110 days.  Often more than 120 days until harvest.  Somewhere in there, as the fruit sets,  try to make time to “block” your fruits by lifting them off the ground with a scrap piece of wood. The scrap wood only needs to be 4″x 4″ or so.  Once you have the wood blocks, you can use them over and over for years. I keep them in small stacks near the edge of the patch. It does take some getting used to, but it helps to safeguard from rot that can occur due to surface moisture as well as insects that can damage the surface of your squash.

The above featured squash shows what damage can occur.  Luckily, the harvest occurred before it caused the pumpkin to degrade on the inside.  Since I caught this while it was simply a surface issue, I happily made it into my beloved squash curry for myself.  This could have easily gone deeper into the pumpkin and caused the entire fruit to be lost.

With the way I farm, there is no true “loss” because the damaged squash can become nutritious pet food, chicken food, and rich soil building materials.  But when you farm small, you need to think smart and safeguard what you grow.  Some squash simply drop from the vine, and others may only half develop due to incomplete pollination by bees at flowering.  These things happen, and it is just simply part of the natural cycle of things.  What you can do, is give a little extra tlc to the fruits, and you will be rewarded with picture perfect produce that inspire chefs to put them on display before heading into the kitchen. One chef that I will not name, has been seen giving a slight hug to the squash as they enter his kitchen domain. Huggable produce is good produce.

This extra step in protecting the skin of your  squash will probably add an overall awareness by creating an intimacy with your farm as well.  You can tell a lot from how your squash are flowering and fruiting. A watchful farmer can see signs of insects, powdery mildew, the need for some fish fertilizer, pruning, and more, by stepping carefully into the vines.  These preventative observations can really make the difference in having a successful season. So while you are inspecting your fruits, give them a boost.  You will be rewarded at harvest time.

The Fermented Farm: Beer Traps

People ask me what school of farming I use.  There are a lot of groups to choose from:  organic, no-till, Hawaiian natural farming, Korean natural farming, biodynamic, intensive, permaculture…the list goes on and on.  I use elements of all of those, and I have adapted them to the particular situation I have, and my situation is one of ever changing conditions.  If there is any one thread that continues through all aspects of my farming, it is microbes.  Today, I am going to share one of the ways fermentation is part of my farming practice.  Beer!  Yes simple as it may seem, the humble dregs of beer kegs, and other cast away remains of beer gets used in my farming as beer traps.

A beer trap is my way of capturing the insects, slugs, and snails that would otherwise damage newly planted seeds, and seedlings.  It is a highly effective way of trapping them before you plant your seeds or seedlings, as well as during your growing season. I trap before I plant.  People often think that in the dry upcountry, we don’t have slugs and snails, but we do.  When you add a little moisture to the plot, every single slug or snail will be drawn to that parcel.  By simply taking reclaimed cups, saucers, trays, plastic tubs, and the like, and putting an inch or more of beer in the bottom, you will have a very effective way of removing the pests from your field.  My strategy is to place traps near new plots of seedlings, depending on the time of year, I will catch a wide variety of the bugs that would lessen my productivity.

DSC_0693

Above are two small traps that will be put out today.  With this small amount of beer, you will be surprised what shows up in there.  I can add some water to top off the traps.  Each day the beer trap will have a riper aroma, making it even more tempting as bait.  To increase your success, you can burry the traps so that they are nearly flush with your soil, you can make them larger, deeper, out of different materials, but the basic idea remains the same.  Trap before you plant and you will see results.


Farm Fermentations: squash, beet and seaweed

I began fermenting back in July as a means of finding even more uses for the vegetables that I grow.  In the past six months, I have continued to explore ways that fermentation can be good for me, my farm, other farmers, and the entire community.  It continues to be a journey of discovering new things with each new ferment.

This past week I decided to continue to work with other farmers and their abundance.  It turns out that my quarts of fermented produce have become a wonderful item to barter with. Squash is the core of all I do, so squash is also the core foundation of my fermentation.  I have experimented with two varieties of winter squash, one variety of summer squash from my fellow farmer Lark, and pipinola.  Pipinola is what I consider a cousin of squash.  We have a unique name for it here in Hawaii, but it is more commonly known as chayote.

I have previously sung the wonders of pipinola on my webpage, but I would like to add that it is a good source of vitamin C.  Raw chayote it crunchy, and crisp, which are two great things for fermentation.  It is also quite neutral in flavor and color, making it my fill in for cabbage.  It also releases water quite easily when salt is added.

DSC_0745

I began my pipinola growing with green skinned heavily wrinkled fruits.  I found a variation that I liked which was a smoother, softer skinned fruit.  I selected these traits and gradually replanted the fruits that displayed this smooth skin.  Like any variation there are upsides and downsides.  The smoother, softer skin, makes the skin easily used in the kitchen instead of the tougher skinned ones.  The downside, is that they are much more susceptible to damage through bruising and nicks.  Pipinola/chayote is grown by replanting the fruits, and the one large seed within will germinate with a dynamic vine.

One you have your fermentation base vegetables, it is great to explore how new combinations can change it all up.  So this week, I investigated how other farm goods can be brought into the mix.  I have always loved root vegetables which are not easy to grow where I am farming.  Beets have come into season again here in Hawaii, so it was time to revisit the Bonk family and get my hands on some beets. Marlene was happy to take a quart of pumpkin/carrot/pipinola kraut, while I was excited to fill my bag with beets.

With each new vegetable, I create a series of ferments that are linked by that one new flavor.  If we were talking fashion design, my ferments would be a collection, so I will refer to them as such.  In the beet collection, I decided to marry the sweet with the heat of ghost peppers in another, as featured above, I threw it all in.

Each of us will like different combinations of vegetables, and as is the case with fermentation, you may like some fermented vegetables, that you do not like unfermented.  Fermentation transforms, melds, marries flavors into a complex profile.  So with the new addition of beets, we can look at how they shape the ferment in terms of nutrition, flavor, and color.    There is also the need to consider what is the limit of how much beet we can handle?  When is it enough? Experiment so to know the limitations of your ferments.  I love seaweed, known here as limu, but there is a point where enough is enough.  To much limu can make the ferment very salty, and very intense in minerals. It can pack a punch and “kinda levels” those not used to it.  I feel like beet could go the same route, in being an overpowering vegetable, where you need to understand how to use it as an accent, in a combination of flavors, and as a main flavor. As is the story of fermentation, time will tell. Longer fermentation time may make it mellow…or not.

DSC_0659.JPG

Above, locally sourced Ogo seaweed is busy making my ferments both intense and complex.

Repurposing found objects is also a great way to begin in fermenting.  I chose to repurpose a 4 qt crock pot crock and found a lid that would work with it.  Most of my ferments are done in one quart jars, but I decided to try a larger quantity of the “kitchen sink” ferment.  Quart jars were used for smaller volume experiments.

I’ll be keeping you posted on how the new farm ferment collection turns out, but until then, think in terms of abundance in your garden, your cellar, your farmers market, and region.  Abundance is a luxury as long as you do not allow it to overwhelm you.  Too much of a good thing can be stressful, and putting up a bushel of vegetables on your own, is quite a task.  I can honestly tell you that it does get easier to work your way through a volume of produce.  I think starting with what would roughly fit in a grocery bag is a good place to start.  So give it a try…and good luck!